If anyone asks me what is the most important thing when building an Arena deck, I would right off the bat say it’s “the curve”. The reason I would give such an answer is not that I have complete confidence that the curve is actually the most important aspect of the Arena. The curve is my go to response because I believe it is the first thing anybody should learn in order to improve his Arena performance.
The value of learning how to identify and evaluate someone’s deck curve is very high, but it is also a very simple concept that should not take much time to incorporate. I’ll admit that there is a lot of fine tuning and decision making when you are trying to choose between what cards better fit your deck’s mana curve, and that takes some time to learn. But if you never heard about the curve and you are reading about it for the first time on this article, I guarantee that your performance on the Arena will be improved if you implement the very simple tips that i’ll reveal.
What is the curve?
To put it simply, the curve is the distribution of mana costs between the cards on a particular deck. How many 1-mana cards do you have in your deck? What about 3 and 4? Do you even have any 8- mana cards?
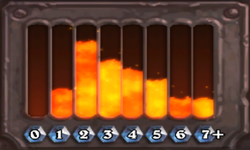
The impact of the curve on how the corresponding deck operates during a game is so huge that Blizzard implemented a feature on the Arena deckbuilding to show it to you. When you are choosing the cards that you are going to play on your Arena deck, you can see how many cards of each cost you have picked before, and that is something that you should take in consideration on your decisions. Props to Blizzard for giving us such feature, otherwise we would have to count how many cards of each cost we have in our deck every time we need some information about our deck’s curve.
The importance of the curve
The reason why the mana curve is so important in hearthstone is the mana system. Under normal circumstances, each player receives 1 mana crystal on each of his turns. What this means is that on his first turn a player will have 1 mana available to play his cards, 2 on the second, 3 on the third and so on. Mana is one of the main resources a player has to manage in order to be be successful in defeating his opponent, life and cards being the other 2 most obvious resources.
So, how does the mana system and the mana cost of cards in a deck relate strategically? One very basic concept is that each player should minimize the amount of mana wasted on each of his turns, because each mana that is wasted is a missed opportunity to develop his board presence (more discussion on board presence on future articles).
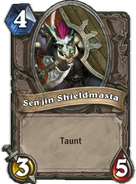
If a player is on his fourth turn and all cards in his hand cost 5 or more mana, all he can do is use his hero power and waste 2 mana. This is a very poor situation for that player, even more so if the opponent has played a good 4 mana card on his turn. Imagine you are a paladin and on your fourth turn you have no cards to play (all cost 5 or more) and you only use your hero power (reinforce : put a 1/1 in play). Then on his turn your opponent plays a Seijin Shieldmasta (3\5 and taunt). Now the difference in board presence (1/1 mininon vs 3\5 minion with taunt) is very big and your opponent is in great advantage.
On a similar situation, imagine you are on your fourth turn and all you can play is a 3 mana card. You will waste a mana there because you cannot use your hero power, so you are missing an opportunity to play a 4 mana card that turn instead. If you compare 3 mana cards with 4 mana cards, you can see that the 4 mana cards are obviously more powerful so that situation could be very disadvantageous. Imagine now that you are on the seventh turn and all you have to play is a 2 mana card plus your hero power. If your opponent plays a 7 mana card on his turn, the problem is even worse.
Ideally a player should play a 1 mana card on his first turn, a 2 mana card on the second, a 3 mana card on the third and so on. In practice this is very difficult to achieve due to the randomness of the draws, but a player should always try to keep wasted mana to a minimum.
The reason why the mana curve is so important in hearthstone is the mana system. Under normal circumstances, each player receives 1 mana crystal on each of his turns. What this means is that on his first turn a player will have 1 mana available to play his cards, 2 on the second, 3 on the third and so on. Mana is one of the main resources a player has to manage in order to be be successful in defeating his opponent, life and cards being the other 2 most obvious resources.
So, how does the mana system and the mana cost of cards in a deck relate strategically? One very basic concept is that each player should minimize the amount of mana wasted on each of his turns, because each mana that is wasted is a missed opportunity to develop his board presence (more discussion on board presence on future articles).
If a player is on his fourth turn and all cards in his hand cost 5 or more mana, all he can do is use his hero power and waste 2 mana. This is a very poor situation for that player, even more so if the opponent has played a good 4 mana card on his turn. Imagine you are a paladin and on your fourth turn you have no cards to play (all cost 5 or more) and you only use your hero power (reinforce : put a 1/1 in play). Then on his turn your opponent plays a Seijin Shieldmasta (3\5 and taunt). Now the difference in board presence (1/1 mininon vs 3\5 minion with taunt) is very big and your opponent is in great advantage.
On a similar situation, imagine you are on your fourth turn and all you can play is a 3 mana card. You will waste a mana there because you cannot use your hero power, so you are missing an opportunity to play a 4 mana card that turn instead. If you compare 3 mana cards with 4 mana cards, you can see that the 4 mana cards are obviously more powerful so that situation could be very disadvantageous. Imagine now that you are on the seventh turn and all you have to play is a 2 mana card plus your hero power. If your opponent plays a 7 mana card on his turn, the problem is even worse.
Ideally a player should play a 1 mana card on his first turn, a 2 mana card on the second, a 3 mana card on the third and so on. In practice this is very difficult to achieve due to the randomness of the draws, but a player should always try to keep wasted mana to a minimum.
For each his own curve
Taking all that into consideration, what is the best distribution of mana cost that a deck could have? First of all, there is no exact science to determine an optimal curve of mana costs that maximize the chance of winning. There are a lot of other variables that should be taken into the decision process, such as play style of each player, aggressiveness of the deck and difference in power level between cards of different mana costs.
Also, each hero combined with his hero specific cards could influence the value of a card if you compare that same card in another deck. For instance, a shaman deck that has 1 or 2 bloodlusts could make great use of a lower curve, consisting of many 1 and 2-mana cards instead of 6 and 7-mana cards. One strategy that is very popular (and sometimes very powerful) in such decks is to put all you low cost minions on board, use you hero power 2 or 3 times and then use bloodlust with a full board of minions to defeat the enemy in one large alpha attack. If a player is building that kind of deck with the shaman, the value of 1 and 2-mana cost cards is higher than if he was building a different kind of deck.
When building your deck on the Arena, the mana curve is one of the most important factors to take into consideration, but a player should not forget about other factors such as card power. Sometime you will receive the option to pick a 2-mana card that is more powerful than the other 3-mana options. In that case it makes no sense to pick the 3-mana cards, even if the your curve is missing on the 3-mana spot. In this situation you may end up with too many 2-mana cards but it was still correct to build the deck the way you did.
Another thing to keep in mind is that the distribution of mana costs shown by the game interface (literal curve) might trick you into making wrong decisions. This usually happen because some cards are best used on turns that do not correspond to the mana cost of the card. A card that illustrate this very clearly is savagery. Under normal circumstances you do not want to play savagery on your turn three, because your hero attack is more likely 0 and the card would have no effect on board. But on the mana curve that shows up on the Arena deck building interface, savagery will add to the 3-mana spot count, and that could trick a player into choosing less 3-mana cards than he actually needs. So be aware that the mana curve shown by the game can be deceiving and stop to actually count your cards on that situation.
Spot by spot analysis
On this last part of the article I will give some advice on how to evaluate the cards on each spot of the mana curve. Those are general tips that should help anyone that is struggling to build a good Arena deck. Keep in mind that those are based on my experience and there are other players who achieve the same kind of results I have (or even better) using different approaches. I’ll try to focus on neutral minions, because they show up for any class you play. Later on the article series I’ll get into detail about class specifics strategies and talk a little more about spells.

1 Mana
The one mana spot on the curve is very tricky. The value of minions that cost one mana varies a lot depending on what hero you will be facing in the Arena. Normally, one drops are either 1/1 or 2/1 minions with a small effect included. This makes them very vulnerable to Rogues, Druids and Mages, who can simply use their hero power to remove your small creature without expending a card. Also, Paladins could summon 1/1 minions that can trade with those cards very profitably.
One way to work around this problem is to play minions that are less vulnerable to those hero powers, such as flame imp, worgen infiltrator and voidwalker. Another way to utilize 1 drops profitably is to pick minions that have valuable effects when played on later turns, such as abusive sergeant and voodoo doctor. If you are facing a Mage for instance, you can hold those cards in hand until you find an opportunity to abuse their battlecry effect. In that case it is also good to replace them on your starting hand, and if you draw them later you could use them just for the additional effect.
It is also good to keep in mind that some players skip the one drop completely. In that case, if you manage to trade one of your 1-mana minions for a card that cost 2 or 3 mana, you should be able to capitalize on some board advantage. On the other hand, some players play too many 1 drops and end up exposing themselves to board wipe effects such as consecration and arcane explosion.
The coin is another factor that should be taken into consideration when evaluating 1 drops. A very powerful play on the draw is to use the coin on turn 1 and play a 2 mana minion before your opponent has the opportunity to do so. If you are the kind of player who likes that kind of play, keep in mind that you will have less opportunities to take advantage of 1 drops.
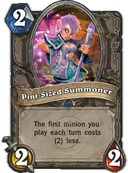
Regarding 1 mana spells, its ok to have some in your deck, but keep in mind that they could become useless as the game go long. The best use here is to play them on turn three in addition to a 2-mana card or a hero power. Also they could give you some protection from really powerful early drops such as pint sized summoner.
Bottom line, the 1-mana spot on the curve is one that can fluctuate between a small handful of cards and none at all. If your deck end up with no 1-mana cards you don’t need to worry at all, but if you end up with too many you could be exposing yourself in the middle to late game.
The one mana spot on the curve is very tricky. The value of minions that cost one mana varies a lot depending on what hero you will be facing in the Arena. Normally, one drops are either 1/1 or 2/1 minions with a small effect included. This makes them very vulnerable to Rogues, Druids and Mages, who can simply use their hero power to remove your small creature without expending a card. Also, Paladins could summon 1/1 minions that can trade with those cards very profitably.
One way to work around this problem is to play minions that are less vulnerable to those hero powers, such as flame imp, worgen infiltrator and voidwalker. Another way to utilize 1 drops profitably is to pick minions that have valuable effects when played on later turns, such as abusive sergeant and voodoo doctor. If you are facing a Mage for instance, you can hold those cards in hand until you find an opportunity to abuse their battlecry effect. In that case it is also good to replace them on your starting hand, and if you draw them later you could use them just for the additional effect.
It is also good to keep in mind that some players skip the one drop completely. In that case, if you manage to trade one of your 1-mana minions for a card that cost 2 or 3 mana, you should be able to capitalize on some board advantage. On the other hand, some players play too many 1 drops and end up exposing themselves to board wipe effects such as consecration and arcane explosion.
The coin is another factor that should be taken into consideration when evaluating 1 drops. A very powerful play on the draw is to use the coin on turn 1 and play a 2 mana minion before your opponent has the opportunity to do so. If you are the kind of player who likes that kind of play, keep in mind that you will have less opportunities to take advantage of 1 drops.
Regarding 1 mana spells, its ok to have some in your deck, but keep in mind that they could become useless as the game go long. The best use here is to play them on turn three in addition to a 2-mana card or a hero power. Also they could give you some protection from really powerful early drops such as pint sized summoner.
Bottom line, the 1-mana spot on the curve is one that can fluctuate between a small handful of cards and none at all. If your deck end up with no 1-mana cards you don’t need to worry at all, but if you end up with too many you could be exposing yourself in the middle to late game.
2 Mana
Things start to get very interesting here. In my opinion, the two mana spot could be the difference between a good deck and a bad deck. Some of the two mana minions have very strong effects, such as mana addict, knife juggler and pint-sized summoner. Playing one of them as early as turn 2 (or turn 1 with the coin) and abusing their effects before your opponent has removal could single handed win the match. Also, most of the 2-mana minions have 2 or more health, so they dodge the hero powers that are so problematic for 1 drops.
Another very interesting aspect of 2-mana minions in hearthstone is that a lot of the good ones have 3 attack, so they can trade with most of the 3-mana minions. This is usually very good for the player playing first, and makes playing a 3/2 minion on turn 2 very important (for both players). Missing on the second turn could get a player very far behind on health or board presence, and if the opponent has a reasonable deck, it could be very hard to get back.
So far, all we talked about the 2 mana minions is very positive, but they have their weakness as well. If you have been paying attention so far, you could notice that most 2 drops could be destroyed by 1, 2 and 3 mana minions. Starting at 4 mana it is very easy to trade profitably with a 2 mana minion, even more so if we take board sweepers into consideration. Also, on the late game, 2 mana minions could be very insignificant compared to 7 mana minios, and could easily be ignored.
To counter that effect, some 2 mana minions have really good effects when played even when drawn late game. Acidic swamp ooze could destroy any weapon, argent defender can give divine shield to a powerful minion and novice engineer can immediately draw a card. Those cards are great if you play early and do not compromise your late game topdecks too much. Also, be aware that you can hold them in hand if you expect a board swipe form your opponent (such as a blizzard from a mage), but do not fear playing them early if you have nothing else to do.
Some people like to think that the 2 drops are less important due to the fact that on turn two you could be using your hero power instead. This in my opinion is really bad, mostly because people are overvaluing the use of the hero powers on turn 2. Most of the hero powers have effects that could be replicated by really bad 0 mana cards, such as moonfire (mage hero power) and wisp (paladin). If you choose to play such a bad effect instead of a 2 mana minion, your board presence can fall behind very quickly, and in my opinion that is not worth the card you save up. Obviously it is not always wrong to use the hero power on turn 2, but this is something you should do only when a good opportunity comes, and should not be your starting plan.
In the end, I like to have many 2 mana minions in my Arena decks. 6 or 7 of them is not unreasonable, and you can have even more if you manage to get some good late game effects. Spells are still not great on the 2 mana spot, and are more clunky to play in addition to other cheap spells or hero powers.
3 Mana
We already talked a bit about 3 mana minions. Most of them usually just trade with a 2 mana minion, so the thing you should look for here is to make that trade profitable for you. What that means is that you should look for battlecry or deathrattle effects on 3 mana minions that can trade with 2 mana creatures. Razorfen Hunter and Harvest Golem are very solid here, because you end up with an extra small minion after the trade.
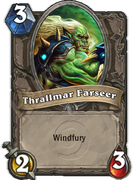
At three mana, some of the minions start getting some potential to become big threats to the opponent. If you combine them with the correct cards, raid leader and Thrallmar Farseer can be very powerful. Some other such as Questing Adventurer and Flesheating Ghoul, can get very big by themselves if you are able to protect them for 2 or 3 turns.
The bad news here is that 3 mana minions are not good at trading with 4 mana minions. Also, most of them get removed from the board when the opponent plays the larger board wipe effects such as hellfire and Flamestryke.
The optimal use of three drops is to mix them with 2 drops for a safe early game, without going overboard. If you get too many 2 and 3 drops (up to 15 is ok) you could get vulnerable to opponents who are able to mitigate the early game damage and play bigger threats later.
At 3 mana, the spells start getting very good. Shadowbolt is a great way to deal with most midrange minions, and hex could remove anything from the other side from the table.
We already talked a bit about 3 mana minions. Most of them usually just trade with a 2 mana minion, so the thing you should look for here is to make that trade profitable for you. What that means is that you should look for battlecry or deathrattle effects on 3 mana minions that can trade with 2 mana creatures. Razorfen Hunter and Harvest Golem are very solid here, because you end up with an extra small minion after the trade.
At three mana, some of the minions start getting some potential to become big threats to the opponent. If you combine them with the correct cards, raid leader and Thrallmar Farseer can be very powerful. Some other such as Questing Adventurer and Flesheating Ghoul, can get very big by themselves if you are able to protect them for 2 or 3 turns.
The bad news here is that 3 mana minions are not good at trading with 4 mana minions. Also, most of them get removed from the board when the opponent plays the larger board wipe effects such as hellfire and Flamestryke.
The optimal use of three drops is to mix them with 2 drops for a safe early game, without going overboard. If you get too many 2 and 3 drops (up to 15 is ok) you could get vulnerable to opponents who are able to mitigate the early game damage and play bigger threats later.
At 3 mana, the spells start getting very good. Shadowbolt is a great way to deal with most midrange minions, and hex could remove anything from the other side from the table.
4 Mana
At 4 mana, the minions start getting really big and hard to remove. Seijin Shieldmasta is the favorite taunt minion for a lot of good players, because it is really hard to remove and protects you very well from enemy attacks. The opponent usually has to use 2 or 3 minions to remove the taunter, and most likely will lose a full turn of attacks. That is very profitable if you are the controlling player, since you mitigate the damage you could have taken and is free to start playing your higher costed minions and turn the game in your favor.
Also, at 4 mana the minions could start getting some really good effects. Cult master can snowball your opponent in card advantage, and ancient mage can get too much spell power for him to handle. Defender of argus could get the much needed taunt minions on the table and Violet Teacher is a very big minion that can fill your board very quickly if not removed.
A lot of the important spells occupy the 4 mana spot for most of the classes. Fireball and Polymorph are the staple removal from the mage. Multishot, Swipe, Hellfire and Shadow Madness are very good at removing two or more small minions from the opponent, and are key to control early aggression from aggro decks.
In the end, it is very important to have 4 mana cards in your deck. They are powerful enough to turn the game in your favor by themselves, but don’t come too late to the party. Also, they don’t lose much to 5 mana minions and spells, so its ok to have some more 4 mana cards if you skip the 5 spot.
5 Mana
The power level of the most common 5 mana cards is not much greater compared to the 4 mana cards, but coming into play one turn later could easily mean that you fall too much behind. The most obvious example is comparing Fen Creeper to Seijin Shieldmasta. For the extra mana, all you get from the 5 drop is an extra health, which is very rarely relevant.
One really bad problem with 5 mana cards is that it is very risky to keep them on your starting hand, and they are horrible draws on the early turns. If you keep a single 5 mana card in hand and you draw more late game cards on your earlier turns, you can end up with nothing to play. Even if you use the coin, the effect of 5 mana cards can sometimes be not enough to turn the game in your favor if the opponent has a better start.
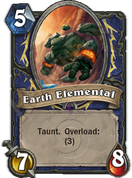
At 5 mana, rares, epics and legendaries start to become really powerful. Cards like Sylvanas Windrunner, Earth Elemental and Blizzard are really powerful, and can swing the game in your favor by themselves. Those cards are easy picks at any point of the Arena deckbuilding, so you might want to hedge your bets and not pick less powerful 5 drops early. If choose to get some weak 5 drops early in the Arena and then you receive the option to pick one or two of the really powerful 5 drops later, you might end up with too many cards that cost 5 mana.
The power level of the most common 5 mana cards is not much greater compared to the 4 mana cards, but coming into play one turn later could easily mean that you fall too much behind. The most obvious example is comparing Fen Creeper to Seijin Shieldmasta. For the extra mana, all you get from the 5 drop is an extra health, which is very rarely relevant.
One really bad problem with 5 mana cards is that it is very risky to keep them on your starting hand, and they are horrible draws on the early turns. If you keep a single 5 mana card in hand and you draw more late game cards on your earlier turns, you can end up with nothing to play. Even if you use the coin, the effect of 5 mana cards can sometimes be not enough to turn the game in your favor if the opponent has a better start.
At 5 mana, rares, epics and legendaries start to become really powerful. Cards like Sylvanas Windrunner, Earth Elemental and Blizzard are really powerful, and can swing the game in your favor by themselves. Those cards are easy picks at any point of the Arena deckbuilding, so you might want to hedge your bets and not pick less powerful 5 drops early. If choose to get some weak 5 drops early in the Arena and then you receive the option to pick one or two of the really powerful 5 drops later, you might end up with too many cards that cost 5 mana.
6 Mana
When the game reaches the sixth turns, most likely one of the players got an advantage on the other, and things are heading quickly to an end. What this means is that 6 mana cards need to have an immediate impact on the board, otherwise the player with the advantage might simply ignore them. Also, at this cost, minions need to have some kind of protection, because at this point of the game your opponent is very likely to have a efficient way to remove it from the board. Having your 6 mana minion polymorphed is really frustrating, even more so if you opponent has more board presence then you.
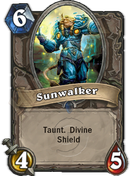
Battlecry effects, charge and taunt is what you want to see on your 6 mana minions, if possible also divine shield. Those effects guarantee that your minions will be effective on the turn they are played, and can help you even if your opponent has a way to remove it from the board next turn. This is the reason why Argent Commander and Sunwalker are my favorite 6 mana minions, and have helped me win a lot of my matches.
A lot of what was said about 5 mana cards also applies to 6 mana cards. Be careful not to take many of those early, because your curve might end up too high. Mulligan them early in favor of lower costed cards, you will probably draw them as the game goes long. Also keep in mind that if you got too many 5 mana cards in your deck it might be a good idea to have fewer 6 mana cards.
When the game reaches the sixth turns, most likely one of the players got an advantage on the other, and things are heading quickly to an end. What this means is that 6 mana cards need to have an immediate impact on the board, otherwise the player with the advantage might simply ignore them. Also, at this cost, minions need to have some kind of protection, because at this point of the game your opponent is very likely to have a efficient way to remove it from the board. Having your 6 mana minion polymorphed is really frustrating, even more so if you opponent has more board presence then you.
Battlecry effects, charge and taunt is what you want to see on your 6 mana minions, if possible also divine shield. Those effects guarantee that your minions will be effective on the turn they are played, and can help you even if your opponent has a way to remove it from the board next turn. This is the reason why Argent Commander and Sunwalker are my favorite 6 mana minions, and have helped me win a lot of my matches.
A lot of what was said about 5 mana cards also applies to 6 mana cards. Be careful not to take many of those early, because your curve might end up too high. Mulligan them early in favor of lower costed cards, you will probably draw them as the game goes long. Also keep in mind that if you got too many 5 mana cards in your deck it might be a good idea to have fewer 6 mana cards.

7 Mana or higher
The sad truth about 7 mana cards is that the game might be over before you can play them. This makes picking too many heavy hitters in your Arena deck very risky, and something that I usually do not recommend. Some of my successful decks totally ignore the 7 mana and higher spots on the curve, and simply try to get an early advantage of the game that your opponent cannot recover.
Don’t get me wrong, some of the 7 mana cards are so powerful that you should snap pick them when they show up. Flamestryke’s impact on the board is so devastating that I’m very happy if I get one or two in my Arena decks. It can turn a very unfavorable game into your advantage very easily, and is most likely going to win you the game if you manage to remove all of your opponents minions.
Usually I like to have just one or a couple of late game cards in my deck (7 or more mana). If you want to have more late game cards (maybe you opened some nice legendaries) you need to figure out how you are going to control the game until they come into play. This means that you have to pick a lot of removal and taunt minions to control the board, and skip some aggressive cards.
0 Mana
Zero costed cards might give you the impression that you have a low curve, but that is not always the case. Usually you are going to save those cards for the mid to late game, when their effect is more valuable.
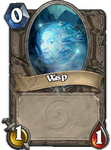
Be careful with 0 costed cards, sometimes their effect is too weak. Some people might be attracted by playing a card “for free”, but they are ignoring the fact that when you play a 0 mana card you are using a card from your hand, and that is one of the most important resources on hearthstone (more on this subject on later articles). I don't like playing cards like Wisp, since their effect is usually ignorable.
Zero costed cards might give you the impression that you have a low curve, but that is not always the case. Usually you are going to save those cards for the mid to late game, when their effect is more valuable.
Be careful with 0 costed cards, sometimes their effect is too weak. Some people might be attracted by playing a card “for free”, but they are ignoring the fact that when you play a 0 mana card you are using a card from your hand, and that is one of the most important resources on hearthstone (more on this subject on later articles). I don't like playing cards like Wisp, since their effect is usually ignorable.
Videos!
After all this information about the curve and my preferences for each mana cost, I think is time to show you a video! This is a card by card analysis of me building an Arena deck. I commented every one of the 30 picks, which made the video kind of long. In the end, this deck manage to get grandmaster key, so I think is a good example of how you can successfully apply the concepts of the curve to your playing. Again, this is my style of deck and may not work for everyone, but I'm sure there is a lot to learn when you see other players building a 9 win Arena deck.
After all this information about the curve and my preferences for each mana cost, I think is time to show you a video! This is a card by card analysis of me building an Arena deck. I commented every one of the 30 picks, which made the video kind of long. In the end, this deck manage to get grandmaster key, so I think is a good example of how you can successfully apply the concepts of the curve to your playing. Again, this is my style of deck and may not work for everyone, but I'm sure there is a lot to learn when you see other players building a 9 win Arena deck.
Conclusion
This article ended up very long, and I know this is not appealing for most people, but there is too much to talk about when it comes to Hearthstone Arena. The curve is one of the most important concepts to learn, so I think it was necessary to write this much, and there is still more to talk about in the future. If you really want to get good at this game, it will be a lot of work, but the rewards are also great.
Keep an eye open for future articles of the series, there is a lot more coming up. I would really like to get some feedback from the readers, so that I can improve future articles of the series. Follow me on twitter if you want to know when I publish other articles, videos or when I’m streaming.
Thank you for reading!
 RSS Feed